How a nice Jewish Boy from Baltimore made it this far. The trials and tribulations, not to mention the fun and frolics of every day life.

Monday, November 15, 2010

A German's View of Islam

I found this e-mail to be very interesting and indeed capturing the essence of its subject is worth repeating.
A German's View on Islam

A man, whose family was German aristocracy prior to World War II, owned a number of large industries and estates. When asked how many German people were true Nazis, the answer he gave can guide our attitude toward fanaticism.
'Very few people were true Nazis,' he said, 'but many enjoyed the return of German pride, and many more were too busy to care.

I was one of those who just thought the Nazis were a bunch of fools. So, the majority just sat back and let it all happen. Then, before we knew it, they owned us, and we had lost control, and the end of the world had come. My family lost everything. I ended up in a concentration camp and the Allies destroyed my factories.'


We are told again and again by 'experts' and 'talking heads' that Islam is the religion of peace and that the vast majority of Muslims just want to live in peace. Although this unqualified assertion may be true, it is entirely irrelevant. It is meaningless fluff, meant to make us feel better, and meant to somehow diminish the spectre of fanatics rampaging across the globe in the name of Islam.

The fact is that the fanatics rule Islam at this moment in history. It is the fanatics who march. It is the fanatics who wage any one of 50 shooting wars worldwide. It is the fanatics who systematically slaughter Christian or tribal groups throughout Africa and are gradually taking over the entire continent in an Islamic wave. It is the fanatics who bomb, behead, murder, or honour-kill. It is the fanatics who take over mosque after mosque. It is the fanatics who zealously spread the stoning and hanging of rape victims and homosexuals. It is the fanatics who teach their young to kill and to become suicide bombers.


The hard, quantifiable fact is that the peaceful majority, the 'silent majority,' is cowed and extraneous.

Communist Russia was comprised of Russians who just wanted to live in peace, yet the Russian Communists were responsible for the murder of about 40 million people. The peaceful majority were irrelevant. China's huge population was peaceful as well, but Chinese Communists managed to kill a staggering 70 million people.


The average Japanese individual prior to World War II was not a warmongering sadist. Yet, Japan murdered and slaughtered its way across South East Asia in an orgy of killing that included the systematic murder of 12 million Chinese civilians; most killed by sword, shovel, and bayonet.


And who can forget Rwanda, which collapsed into butchery. Could it not be said that the majority of Rwandans were 'peace loving'?

History lessons are often incredibly simple and blunt, yet for all our powers of reason, we often miss the most basic and uncomplicated of points:

  • Peace-loving Muslims have been made irrelevant by their silence.
  • Peace-loving Muslims will become our enemy if they don't speak up, because like my friend from Germany, they will awaken one day and find that the fanatics own them, and the end of their world will have begun.
  • Peace-loving Germans, Japanese, Chinese, Russians, Rwandans, Serbs, Afghans, Iraqis, Palestinians, Somalis, Nigerians, Algerians, and many others have died because the peaceful majority did not speak up until it was too late. As for us who watch it all unfold, we must pay attention to the only group that counts--the fanatics who threaten our way of life.

Saturday, May 01, 2010

Abe Lincoln gives his Gettysburg Address

A great video of Lincoln giving his Gettysburg Address. Looks just like him, eh?

Sunday, June 21, 2009

The Epitome of ME


If you've ever shared a meal with me I know you'll agree that this cartoon epitomizes ME.

Monday, November 17, 2008

This day in History - November 1st

November 1, 1914 Naval Battle of Coronel

Battle of Coronel, November 1, 1914, World War I naval battle off Coronel, Chile, South America, in which Germany defeated Britain. When the war began in August 1914, Germany's East Asiatic squadron, under Count Maximilian von Spee, was visiting the Caroline Islands. Eluding British and Japanese pursuers, von Spee sailed east across the Pacific with six vessels: the heavy cruisers Scharnhorst and Gneisenau and the light cruisers Enden, Leipzig, and Nürnberg, as well as the cruiser Dresden. As he approached the west coast of South America, the British sent the cruisers Good Hope and Monmouth, the battleship Canopus, the light cruiser Glasgow, and the armored liner Otranto to intercept him. On November 1 the British squadron, commanded by Admiral Sir Christopher Cradock, met and engaged von Spee off Coronel. The Germans sank the Good Hope (Cradock's flagship) and the Monmouth, with all hands lost, and drove off the other British vessels. Britain avenged this defeat a month later at the Battle of the Falkland Islands.

HMS Good Hope
HMS Good Hope


This day in History - October 29th

October 29, 1956 2nd Arab-Israeli War begins

The 1956 War

From 1949 to 1956 the armed truce between Israel and the Arabs, enforced in part by the UN forces, was punctuated by raids and reprisals. Among the world powers, the United States, Great Britain, and France sided with Israel, while the Soviet Union supported Arab demands. Tensions mounted during 1956 as Israel became convinced that the Arabs were preparing for war. The nationalization of the Suez Canal by Egypt's Gamal Abdal Nasser in July, 1956, resulted in the further alienation of Great Britain and France, which made new agreements with Israel.

On Oct. 29, 1956, Israeli forces, directed by Moshe Dayan, launched a combined air and ground assault into Egypt's Sinai peninsula. Early Israeli successes were reinforced by an Anglo-French invasion along the canal. Although the action against Egypt was severely condemned by the nations of the world, the cease-fire of Nov. 6, which was promoted by the United Nations with U.S. and Soviet support, came only after Israel had captured several key objectives, including the Gaza strip and Sharm el Sheikh, which commanded the approaches to the Gulf of Aqaba. Israel withdrew from these positions in 1957, turning them over to the UN emergency force after access to the Gulf of Aqaba, without which Israel was cut off from the Indian Ocean, had been guaranteed.


Israeli troops preparing for combat in the Sinai peninsula.

This day in History - October 28th

October 28, 1776 Colonists defeated at White Plains

At the end of September 1776, Washington's army held only a small position on the northern tip of Manhattan Island. Howe was determined to outflank the American positions with a landing at Throgs Neck. [1]

In order to prevent himself from being surrounded, Washington withdrew his main army to White Plains when the British landing began.[3] A garrison of 1,200 men was left to defend Fort Washington.[4] Howe's army followed Washington via New Rochelle and up the Bronx River.

Washington halted his army and chose a position near White Plains that he fortified with two lines of entrenchments.[5] The trenches were situated on raised terrain, protected on the right by the swampy ground near the Bronx River. The American defenses were 3 miles (4.8 km) long. Beyond that, on the right, was Chatterton's Hill, which commanded the plain over which the British would have to advance. The hill was occupied by John Haslet's 1st Delaware Regiment, with two cannon, and supported by another brigade, in total about 1,600 men.

While Washington was inspecting the terrain, seeing where it was best to station his troops, he ran into several light horsemen who told him that the British were advancing.[6] Washington rode back to camp to prepare his men. He quickly stationed a couple hundred Continentals and a couple of artillery pieces onto Chatterton Hill to support the militia.[7] The skirmishers, who had the job of slowing the British advance, retired soon after Washington reinforced Chatterton Hill.[8]

Although the British outnumbered the Americans, Howe did not think it was wise to launch an attack on the main American position until they had taken Chatterton Hill.[5] Howe sent two columns to attack it. One was a brigade of Germans led by Johan Rall, and the other was the German Lossberg Regiment.[9] In total, the force numbered about 4,000 men.

The Germans under Rall's command attacked the militia on the crest of the hill, which fled in retreat.[10] The Lossberg Regiment were stopped by heavy fire from the Americans.[11] Two British regiments came in support of the Germans, and charged up the hill, but the Americans counter-attacked, driving them back down.[12] The British once again assaulted, this time wielding their bayonets, and the Continentals, deserted by the Militia, retreated.[13]

Aftermath

While the battle was a victory for the British, Howe refused to interfere with the American withdrawal, letting slip yet another opportunity to capture Washington and much of the Continental army and in the process suffering heavier casualties than the Americans.

The engagement on the White Plains, the 28th of October 1776 : between the American & British Forces / D. Martin sct.

The engagement on the White Plains, the 28th of October 1776 : between the American & British Forces

This day in History - October 26th

October 26, 1881 The Gunfight at the O.K. Corral

On 25th October, Ike Clanton and Tom McLaury arrived in Tombstone. Later that day Doc Holliday got into a fight with Ike Clanton in the Alhambra Saloon. Holliday wanted a gunfight with Clanton, but he declined the offer and walked off.

The following day Ike Clanton and Tom McLaury were arrested by Virgil Earp and charged with carrying firearms within the city limits. After they were disarmed and released, the two men joined Billy Clanton and Frank McLaury, who had just arrived in town. The men gathered at a place called the OK Corral in Fremont Street.

Virgil Earp now decided to disarm Billy Clanton and Frank McLaury and recruited Wyatt Earp, Morgan Earp and Doc Holliday to help him in this dangerous task. Sheriff John Behan was in town and when he heard what was happening he raced to Fremont Street and urged Billy Clanton and Frank McLaury to hand over their guns to him. They replied: "Not unless you first disarm the Earps".

Behan now headed towards the advancing group of men. He pleaded for Virgil Earp not to get involved in a shoot-out but he was brushed aside as the four men carried on walking towards the OK Corral. When they reached the four men, Virgil Earp said: "I want your guns". Billy Clanton responded by firing at Wyatt Earp. He missed and Morgan Earp successfully fired two bullets at Billy Clanton and he fell back against a wall. Meanwhile Wyatt Earp fired at Frank McLaury. The bullet hit him in the stomach and he fell to the ground.

Ike Clanton and Tom McLaury were both unarmed and tried to run away. Clanton was successful but Doc Holliday shot McLaury in the back. Billy Clanton and Frank McLaury, although seriously wounded, continued to fire their guns and in the next couple of seconds Virgil Earp, Morgan Earp and Doc Holliday were all wounded. Wyatt Earp was unscathed and he managed to finish off Billy Clanton and Frank McLaury.

Sheriff John Behan arrested Virgil Earp, Wyatt Earp, Morgan Earp and Doc Holliday for the murder of Billy Clanton, Tom McLaury and Frank McLaury. However, after a 30 day trial Judge Wells Spicer, who was related to the Earps, decided that the defendants had been justified in their actions.

Over the next few months the Earp brothers struggled to retain hold control over Tombstone. Virgil Earp was seriously wounded by an assassination attempt and Morgan Earp was killed when he was playing billiards with Wyatt Earp on 18th March, 1882. Eyewitnesses claimed that Frank Stilwell was seen running from the scene of the crime. Three days later Stilwell's was found dead. A Mexican who was also implicated in the crime was also found murdered in a lumber camp. It is believed that Wyatt Earp was responsible for killing both men.


October 26, 1917 Passchendaele Offensive is begun

two divisions of the Canadian Corps were moved into the line to replace the badly depleted ANZAC forces. After their successes at Vimy Ridge and the Battle of Hill 70. Upon his arrival, the Canadian Commander-in-Chief General Sir Arthur Currie expressed the view that the cost of the objective would be sixteen thousand casualties. While Currie viewed this figure as inordinately high in relation to the value of the objective, Haig had estimated that the casualties from remaining in place would be worse if this objective was not taken.

The Canadians moved into the line during mid-October, and on 26 October 1917, the Second Battle of Passchendaele began with twenty thousand men of the Third and Fourth Canadian Divisions advancing up the hills of the salient. It cost the Allies twelve thousand casualties for a gain of a few hundred yards.

Reinforced with the addition of two British divisions, a second offensive on 30 October resulted in the capture of the town in heavy rains. For the next five days the force held the town in the face of repeated German shelling and counterattacks, and by the time a second group of reinforcements arrived on 6 November, four-fifths of the infantrymen in two Canadian divisions had been lost.

Their replacements were the First and Second Canadian Divisions. German troops still ringed the area, so a limited attack on the 6th by the remaining troops of the Third Division allowed the First Division to make major advances and gain strong points throughout the area.

One such action on the First Division front was at Hill 52; the Tenth Battalion, CEF were called out of reserve to assist an attack on Hill 52, part of the same low rise where Passchendaele was situated. The Battalion was not scheduled to attack, but the Commanding Officer of the Tenth had wisely prepared his soldiers as if they would be making the main assault – a decision that paid dividends when the unit was called out of reserve. On 10 November 1917, the Tenth Battalion took the feature with light casualties.

A further attack by the Second Division the same day pushed the Germans from the slopes to the east of the town. The high ground was now firmly under Allied control.

After all was said and done, General Currie's casualty estimations sadly proved to be remarkably accurate. The battle of Passchendaele cost the Canadian Corps 15 654 casualties with over 4 000 dead to take roughly 6.25 square kilometres of German held territory in 16 days of fighting.[1].

Canadian soldiers won a remarkable 9 Victoria Crosses in the fighting at Passchendale.

Aftermath

Passchendaele could be regarded, by some, as a re-play of the Somme; an offensive mounted by the British and French Forces designed to make large gains in terms of territory. However, given the importance of the Ypres salient — the campaign to clear the high ground east and south of the much battered city was important, but once it began, it had to be completed.

After months of fighting, the Allies had crawled forward 5 miles (8 kilometres) but had gained the high ground that dominated the salient. The price had been almost half a million men of which around 140,000 had been killed. Also reminiscent of the Somme were the colossal artillery barrages which failed to destroy German defenses, but which did inflict enormous losses that the Germans couldn't afford. Ultimately, as a battle of attrition, that captured some important assets, the campaign can be said to be a lean Allied victory.

More than any other battle, Passchendaele has come to symbolise the horrific nature of the great battles of the First World War. In terms of the dead, the Germans lost approximately 260,000 men, while the British Empire forces lost about 300,000, including approximately 36,500 Australians, 3,596 New Zealanders and some 16,000 Canadians from 1915 to 1917. 90,000 British and Dominion bodies were never identified, and 42,000 never recovered. Aerial photography showed 1,000,000 shell holes in 1 square mile (2.56 km²).


Sunday, October 26, 2008

This Day in History October 25th

October 25, 1415 The Battle of Agincourt

Henry V and his troops were marching to Calais to embark for England when he was intercepted by French forces which outnumbered his. English effectiveness and readiness was questionable as a result of their prior maneuvers consisting of an 18 day march across 250 miles of hostile territory under constant harassment. They suffered from dysentery and exhaustion, and were further hampered by inclement weather.

The battle was fought in the narrow strip of open land formed between the woods of Tramecourt and Agincourt (close to the modern village of Azincourt). The French army was positioned by d'Albret at the northern exit so as to bar the way to Calais. The night of 24 October was spent by the two armies on open ground.

Early on the 25th, Henry deployed his army (approximately 900 men-at-arms and 5,000 longbowmen, the latter commanded by Thomas Erpingham) across a 750 yard part of the defile. (It has been argued that fresh men were brought in after the siege of Harfleur; however, other historians argue that this is wrong, and that although 9,200 English left Harfleur, after a 250 mile march and more sickness had set in, they were down to roughly 5,900 by the time of the battle.) It is likely that the English adopted their usual battle line of longbowmen on either flank, men-at-arms and knights in the centre, and at the very centre roughly 200 archers. The English men-at-arms in plate and mail were placed shoulder to shoulder four deep. The English archers on the flanks drove pointed wooden stakes called palings into the ground at an angle to force cavalry to veer off.

On the morning of the 25th the French were still waiting for additional troops to arrive. The Duke of Brabant, the Duke of Anjou and the Duke of Brittany, each commanding 1,000–2,000 fighting men, were all marching to join the army. This left the French with a question of whether or not to advance towards the English.

For three hours after sunrise there was no fighting. The French, knowing that the English were trapped, and perhaps aware of their previous failures attacking English prepared positions, would not attack. Henry would have known as well as the French did that his army would perform better in a defensive battle, but he was eventually forced to take a calculated risk, and move his army further forward. This entailed pulling out the palings (long stakes pointed outwards toward the enemy) which protected the longbowmen, and abandoning his chosen position. (The use of palings was an innovation: during the battles of Crécy and Poitiers, two similar engagements between the French and the English, the archers did not use them.) If the French cavalry had charged before the palings had been hammered back in, the result would probably have been disastrous for the English, as it was at the Battle of Patay. However the French seem to have been caught off guard by the English advance. The tightness of the terrain also seems to have restricted the planned deployment of their forces. A battle plan had originally been drawn up which had archers and crossbowmen in front of the men-at-arms, with a cavalry force at the rear specifically designed to "fall upon the archers, and use their force to break them".[22] However in the event the archers and crossbowmen were deployed behind and to the sides of the men-at-arms, where they seem to have played almost no part in the battle, except possibly for an initial volley of arrows at the start of the battle. The cavalry force, which could have devastated the English line if it had attacked while they moved their position, only seems to have charged after the initial volley of arrows from the English. It is unclear if this is because the French were still hoping the English would launch a frontal assault themselves, or because they simply did not expect the English to advance at the exact moment they did. French chroniclers agree that when the mounted charge did come, it did not contain as many men as it should; Gilles le Bouvier states that some had wandered off to warm themselves and others were walking or feeding their horses.[23]

In any case, within extreme bowshot from the French line (approximately 300 yards), the longbowmen dug in their palings, and then opened the engagement with a barrage of arrows.

The French cavalry, despite being somewhat disorganised and not at full numbers, charged the longbowmen, but it was a disaster, with the French knights unable to outflank the longbowmen (because of the encroaching woodland) and unable to charge through the palings that protected the archers. Keegan (1976) argues that the longbows' main influence on the battle was at this point: only armoured on the head, many horses would have become dangerously out of control when struck in the back or flank from the high-elevation shots used as the charge started. The effect of the mounted charge and then retreat was to further churn up the mud the French had to cross to reach the English. Barker (2005) quotes a contemporary account by a monk of St. Denis who reports how the panicking horses also galloped back through the advancing infantry, scattering them and trampling them down in their headlong flight. The Burgundian sources similarly say that the mounted men-at-arms retreated back into the advancing French vanguard, "causing great disarray and breaking the line in many places".[24]

The constable himself led the attack of the dismounted French men-at-arms. French accounts describe their vanguard alone as containing about 5,000 men-at-arms, which would have outnumbered the English men-at-arms by about 5–1, but before they could engage in hand-to-hand fighting they had to cross the muddy field under a bombardment of arrows. The armour of the French men-at-arms is described by the Burgundian sources Le Fevre and Waurin as follows:

In addition, the French were so weighed down by armour that they could hardly move forward. First, they were armed with long coats of armour, stretching beyond their knees and being very heavy. Below these they had 'harnois de jambes' (leg armour) and above 'blans harnois ' (white i.e. polished armour). In addition they had 'bascinets de carvail'. So heavy were their arms that as the ground was so soft they could scarcely lift their weapons.[25]

Such heavy armour allowed them to close the 300 yards or so to the English lines while being under what the French monk of Saint Denis described as "a terrifying hail of arrow shot".[26] However they had to lower their visors and bend their heads to avoid being shot in the face (the eye and airholes in their helmets were some of the weakest points in the armour), which restricted both their breathing and their vision, and then they had to walk a few hundred yards through thick mud, wearing armour which weighed 50–60 pounds.[27]

The French men-at-arms reached the English line and actually pushed it back, with the longbowmen continuing to fire until they ran out of arrows and then dropping their bows and joining the melee (which lasted about three hours), implying that the French were able to walk through the fire of tens of thousands of arrows while taking comparatively few casualties. The physical pounding even from non-penetrating arrows, combined with the slog in heavy armour through the mud, the heat and lack of oxygen in plate armour with the visor down, and the crush of their numbers, meant they could "scarcely lift their weapons" when they finally engaged the English line however.

When the English archers, using hatchets, swords and other weapons, attacked the now disordered and fatigued French, the French could not cope with their unarmoured assailants (who were much less hindered by the mud). The exhausted French men-at-arms are described as being knocked to the ground and then unable to get back up. As the mêlée developed, the French second line also joined the attack, but they too were swallowed up, with the narrow terrain meaning the extra numbers could not be used effectively, and French men-at-arms were taken prisoner or killed in their thousands. The fighting lasted about three hours, but eventually the leaders of the second line were killed or captured, as those of the first line had been. The English Gesta Henrici describes three great heaps of the slain "which had risen above a man's height" around the three main English standards.[28]

One of the best anecdotes of the battle involves Humphrey, Duke of Gloucester, Henry V's youngest brother. According to the story, Henry, upon hearing that his brother had been wounded in the abdomen, took his household guard and cut a path through the French, standing over his brother and beating back waves of soldiers until Humphrey could be dragged to safety.

[edit] The assault on the baggage train and the killing of the prisoners

The only French success was a sally from Agincourt Castle behind the lines attacking the lightly protected English baggage train, with Ysembart d'Azincourt (leading a small number of men-at-arms and about 600 peasants) seizing some of Henry's personal treasures, including a crown. In some accounts this happened towards the end of the battle, and led the English to think they were being attacked from the rear. Barker (2005) prefers the Gesta Henrici however, believed to have been written by an English chaplain who was actually in the baggage train, who says that the attack happened at the start of the battle.

Regardless, there was definitely a point after the initial English victory where Henry became alarmed that the French were regrouping for another attack. The Gesta Henrici puts this after the English had overcome the onslaught of the French men-at-arms, and the weary English troops were eyeing the French rearguard ("in incomparable number and still fresh"). The Burgundian sources Le Fevre and Waurin similarly say that it was signs of the French rearguard regrouping and "marching forward in battle order" which made the English think they were still in danger.

In any event, Henry ordered the slaughter of what was perhaps several thousand French prisoners, with only the most illustrious being spared. His fear was that they would rearm themselves with the weapons strewn upon the field, and the exhausted English (who had been fighting for about three hours) would be overwhelmed. This was certainly ruthless, but arguably justifiable given the situation of the battle; perhaps surprisingly, even the French chroniclers do not criticise him for this.[29] This marked the end of the battle, as the French rearguard, having seen so many of the French nobility captured and killed, fled the battlefield.

[edit] Aftermath

Due to a lack of reliable sources it is impossible to give a precise figure for the French and English casualties. However, it is clear that though the English were considerably outnumbered, their losses were far lower than those of the French. The French sources all give 4,000–10,000 French dead, with up to 1,600 English dead. The lowest ratio in these French sources has the French losing six times more dead than the English. The English sources vary between about 1,500 and 11,000 for the French dead, with English dead put at no more than 100. The lowest ratio in the English sources has the French losing more than fifty times more dead than the English.[30]

Barker identifies from the available records "at least" 112 Englishmen who died in the fighting (including Edward of Norwich, 2nd Duke of York, a grandson of Edward III), but this excludes the wounded. One fairly widely used estimate puts the English casualties at 450, not an insignificant number in an army of 6,000, but far less than the thousands the French lost, nearly all of whom were killed or captured. Using the lowest French estimate of their own dead of 4,000 would imply a ratio of nearly 9–1 in favour of the English, or over 10–1 if the prisoners are included.

The French suffered heavily. The constable, three dukes, five counts and 90 barons all died. Estimates of the number of prisoners vary between 700 and 2,200, amongst them the Duke of Orléans (the famous poet Charles d'Orléans) and Jean Le Maingre, Marshal of France.


The Battle of Agincourt, 15th century miniature

October 25,1813 - Battle of Chateauguay (25th & 26th) War of 1812

In October of 1813, American Major General Wade Hampton marched his army from Lake Champlain down the Chateauguay River towards the St. Lawrence. This would serve as a feint in support of General Wilkinson’s main thrust against Kingston or, should Wilkinson switch his objective to Montreal, it would allow the two armies to combine on the shores of the St. Lawrence River.

On October 25, Hampton found his way blocked near Spears’ Farm by breastworks of abatis - a tangle of fresh-felled trees. This was the work of Canadian Voltigeurs under Lieutenant-Colonel Charles-Michel de Salaberry. From behind these primitive fortifications, de Salaberry hoped to stop Hampton’s advance.

Hampton judged the abatis too heavily defended to be taken by frontal assault. He grossly overestimated his opponents’ numbers at twice his own; in fact, he outnumbered them by about eight to one. He sent Colonel Robert Purdy with 1500 men on a sixteen mile overnight trek through the forest across the river to flank the Canadians.

After stumbling through the woods until after midnight, Purdy decided to wait for daylight before proceeding. In the morning, de Salaberry’s scouts detected his presence. Lieutenant Colonel “Red George” Macdonell, who’d been charged with guarding the Canadian rear, sent two companies of select embodied militia, including the Glengarry Light Infantry, to stop them. Purdy’s advance guard was just emerging from a cedar swamp when they stumbled into each other. Both sides opened fire. The Americans turned and ran. Several of them were then killed by the main body of Americans who mistook them for charging Canadians.

At two o’clock, Hampton’s main force attacked the abatis. Some of De Salaberry’s men spread out and sounded bugles simultaneously at different points in the forest, further fooling the Americans with regards to the size of their force. Mohawk warriors from Kahnawake, concealed among the trees, fired muskets and whooped loudly. The Americans, believing the bulk of the enemy were coming at them from that direction, fired volley after volley at nothing more than tree branches.

By then, Red George’s militiamen had made contact with Purdy’s detachment. The Americans fired a series of deadly volleys at them, but in the forest gloom, they failed to see that the Canadians were firing from a kneeling position. The American flew harmlessly over the Canadians. Meanwhile, Canadian muskets took a considerable toll on their enemy.

Purdy tried to outflank Red George’s men by skirting along the riverbank, but de Salaberry had anticipated that move and placed a detachment, muskets at the ready on the far bank of the narrow river. One volley was enough to send the Americans back inside the trees. Tired, wet, and believing themselves vastly outnumbered, the Americans had had enough. General Hampton ordered a general withdrawal.

For want of a decisive leader, the Americans had squandered another opportunity to win significant British territory. De Salaberry complained bitterly that Sir George Prevost and General de Watteville, who never came near the action, took most of the credit for themselves.


Bataille de la Chateauguay by Henri Julien. Lithograph from Le Journal de Dimanche, 1884.


October 25, 1854 Battle of Balaklava in the Crimean War


The battle started with a successful Russian attack on Ottoman positions. After holding out against the Russians, the Turks were either killed or were forced to retreat from their redoubts.This allowed the Russians to break through into the valley of Balaclava, where British forces were encamped. The port of Balaclava, a short distance to the south, was the site of a key British supply base. The Russian advance was intended to disrupt the British base and attack British positions near Sevastopol from the rear.


An initial Russian advance south of the southern line of hills was repulsed by the British. A large attacking force of Russian cavalry advanced over the ridgeline, and split into two portions. One of these columns drove south towards the town of Balaclava itself, threatening the main supply of the entire British army. That drive was repulsed by the muskets of the 93rd (Highland) Regiment and the now-reformed Turks. Forming a lone line of two rows by its commander,Sir Colin Campbell, they were able to deceisively halt the Russian advance. This action became known in history as "The Thin Red Line".


The second column of Russian cavalry was then met by the British Heavy Brigade, in an uphill charge that defied conventional military logic. This action by the British cavalry forced the Russians to retreat to their artillery, which was strategically positioned along the ridges above the valley. At this point, Raglan ordered the Light Brigade to "prevent the enemy carrying away the guns", in a written order delivered by Captain Nolan. Though the following events are somewhat unclear, it is generally accepted that Nolan was aware that Lord Raglan had intended for the Light Brigade to charge the captured British guns that were being carried off the redoubt by the Russians. According to contemporary accounts, Nolan delivered the written order in haste while verbally indicating to Lord Cardigan that he should direct an assault upon the Russian gun battery that was down the valley. This action resulted in what would come to be known as the Charge of the Light Brigade. After its initial charge was repulsed, the Light Brigade was saved from further casualties by a supporting attack from the French 4th Chasseurs d'Afrique.


The battle ended inconclusively, with both sides retaining their starting positions. Aleksandr Sergeyevich Menshikov, the Russian commander, later claimed success, saying the attack was only a probe to gauge allied defence.


This Day in History October 24th

October 24, 1917 German Caporetto Offensive Begins

One of the more spectacular successes of the war, the Battle of Caporetto (also referred to as the Twelfth Battle of the Isonzo) saw combined Austro-Hungarian and German forces decisively break through the Italian line along the northern Isonzo, catching the Italian defenders entirely by surprise. The scale of the Italian defeat at Caporetto led to both a change in government and Luigi Cadorna's dismissal as Chief of Staff.

Caporetto marked the first occasion on which the Germans had determined to provide assistance to their Austro-Hungarian allies on the Italian front. Although Cadorna's policy of launching successive breakthrough attacks along the Isonzo was proving highly costly in terms of Italian casualties, it was nevertheless succeeding in dangerously weakening Austro-Hungarian resources.

With the Austro-Hungarian front around Gorizia in danger of collapse (following Cadorna's Eleventh Battle of the Isonzo), the German Third Supreme Command, under Paul von Hindenburg and Erich Ludendorff, accepted the advice of Austro-Hungarian Commander in Chief Arz von Straussenberg to launch a combined operation, intended for September 1917.

Cadorna, who had long feared German intervention at the Isonzo, began to received reports - from deserters and via aerial reconnaissance - of German activity. He therefore called off his own attacks on the Isonzo in mid-September, preferring instead to adopt a defensive posture.

There is little doubt that Cadorna was unaware of the actual strength of the Austro-Hungarian/German forces massing against him. The Austro-Hungarian high command was initially in favour of repeating their 1916 Trentino offensive against the Italians. Overruled however by the Germans, a 25 km line was carefully selected in front of Caporetto, north of Gorizia and along the Isonzo, as the preferred point of attack.

The Third Supreme Command's intention in launching the Caporetto offensive was chiefly to provide the Austro-Hungarian army with the opportunity for recuperation. Hindenburg and Ludendorff assuredly did not anticipate the spectacular success of the actual operation.

Nine Austrian divisions were supplemented by six German divisions (supplied by General von Hutier from Riga) and placed under Otto von Below's command as the Fourteenth Army in October 1917. Although the Italians retained overall numerical supremacy along the Isonzo front (by some 41 divisions to 35), they were notably weaker at the point selected by the German army for the combined offensive.

The local Italian commander at Caporetto, Capello, was ordered to prepare a defensive line: he chose instead to adopt an aggressive posture, massing his troops for an attack upon the southern flank of von Below's army to the east of Gorizia.

Launched at 2am on 24 October 1917 from a salient at Tolmino and much aided by prevalent misty conditions, the Austro-Hungarian/German attack took the Italians by complete surprise.

Initiated with a heavy artillery barrage of high explosives, gas and smoke, the combined force broke through the Italian Second Army's lines almost immediately. They progressed a remarkable 25 km by the close of the day, adopting infiltration tactics and exploiting breaches in the Italian line with the use of grenades and flamethrowers.

Below's secondary attacks either side of the main offensive were however more competently staved off by the Italians. Similarly, the Austro-Hungarian Fifth Army under Boroevic made little progress at the southern coast. Nevertheless, Below's sweeping success in the centre endangered the bulk of the Italian forces at the River Tagliamento.

Once his lines were rapidly broken on that first morning, Capello recommended a withdrawal to the Tagliamento. He was overruled by Cadorna who harboured hopes of repairing the damage for almost a week until, on 30 October, the majority of Italian forces were instructed to cross the river, a process that took some four days.

Meanwhile a German division had established a bridgehead further north at the Tagliamento on 2 November. Ironically, the success of the combined Austro-Hungarian/German forces in moving forward so rapidly began to work against them, with supply lines at full stretch and starting to fail.

Cadorna took advantage of the Austro-Hungarian/German inability to launch a fresh offensive by ordering a withdrawal to the River Piave, a mere 30 km north of Venice - a process that lasted until approximately 10 November.

The scale of the Italian setback - some 300,000 casualties had been incurred (90% of which were as prisoners), with virtually all artillery lost - had already produced sizeable shockwaves among the Allied governments. At home Cadorna was dismissed and replaced by Armando Diaz; a new Prime Minister, Vittorio Orlando, similarly took office, replacing Boselli. He promptly received assurances of increased military support from Allied governments.

Until Caporetto the Italians had been left to fight the Austro-Hungarian army alone on the Italian front. With the advent of German support and the disaster at Caporetto however this policy was revoked, with substantial Allied aid promised thenceforth. Six French Army divisions (under Fayolle) were supplemented by five British divisions (under Plumer), both boosted by large air contingents.

Italian public opinion, shocked by the events at Caporetto, rallied behind Orlando's government, with popular pacifist sentiment effectively silenced. The Austro-Hungarians attempted to follow-up the success at Caporetto with an attack at the Trentino on 12 November, but finding themselves short of reserves the attack petered out five days later, although sporadic fighting continued into December.

Battle of Caporetto and Italian retreat.


This Day in History October 23rd

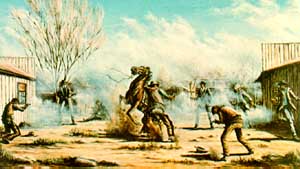
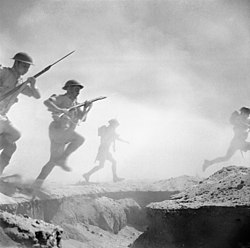
October 23, 1942, The Battle of El Alamein Begins

In July 1942, General Erwin Rommel and the Italo-German Panzer Armee Afrika, (part of the Deutsches Afrika Korps) were only 113km (70 miles) from Alexandria. The situation was so serious that Winston Churchill made the long journey to Egypt to discover for himself what needed to be done. Churchill decided to make changes to the command structure. General Harold Alexander was placed in charge of British land forces in the Middle East and Bernard Montgomery became commander of the Eighth Army.

On 30th August, 1942, Erwin Rommel attacked at Alam el Halfa but was repulsed by the Eighth Army. Montgomery responded to this attack by ordering his troops to reinforce the defensive line from the coast to the impassable Qattara Depression. Montgomery was now able to make sure that Rommel and the German Army was unable to make any further advances into Egypt.

Over the next six weeks Montgomery began to stockpile vast quantities of weapons and ammunition to make sure that by the time he attacked he possessed overwhelming firepower. By the middle of October the Eighth Army totalled 195,000 men, 1,351 tanks and 1,900 pieces of artillery. This included large numbers of recently delivered Sherman M4 and Grant M3 tanks.

On 23rd October Montgomery launched Operation Lightfoot with the largest artillery bombardment since the First World War. The attack came at the worst time for the Deutsches Afrika Korps as Erwin Rommel was on sick leave in Austria. His replacement, General George Stumme, died of a heart-attack the day after the 900 gun bombardment of the German lines. Stume was replaced by General Ritter von Thoma and Adolf Hitler phoned Rommel to order him to return to Egypt immediately.

The Germans defended their positions well and after two days the Eighth Army had made little progress and Bernard Montgomery ordered an end to the attack. When Erwin Rommel returned he launched a counterattack at Kidney Depression (27th October). Montgomery now returned to the offensive and the 9th Australian Division created a salient in the enemy positions.

Winston Churchill was disappointed by the Eighth Army's lack of success and accused Montgomery of fighting a "half-hearted" battle. Montgomery ignored these criticisms and instead made plans for a new offensive, Operation Supercharge.

On 1st November 1942, Montgomery launched an attack on the Deutsches Afrika Korps at Kidney Ridge. After initially resisting the attack, Rommel decided he no longer had the resources to hold his line and on the 3rd November he ordered his troops to withdraw. However, Adolf Hitler overruled his commander and the Germans were forced to stand and fight.

The next day Montgomery ordered his men forward. The Eighth Army broke through the German lines and Erwin Rommel, in danger of being surrounded, was forced to retreat. Those soldiers on foot, including large numbers of Italian soldiers, were unable to move fast enough and were taken prisoner.

For a while it looked like the the British would cut off Rommel's army but a sudden rain storm on 6th November turned the desert into a quagmire and the chasing army was slowed down. Rommel, now with only twenty tanks left, managed to get to Sollum on the Egypt-Libya border.

On 8th November Erwin Rommel learned of the Allied invasion of Morocco and Algeria that was under the command of General Dwight D. Eisenhower. His depleted army now faced a war on two front.

The British Army recaptured Tobruk on 12th November, 1942. During the El Alamein campaign half of Rommel's 100,000 man army was killed, wounded or taken prisoner. He also lost over 450 tanks and 1,000 guns. The British and Commonwealth forces suffered 13,500 casualties and 500 of their tanks were damaged. However, of these, 350 were repaired and were able to take part in future battles.

Winston Churchill was convinced that the battle of El Alamein marked the turning point in the war and ordered the ringing of church bells all over Britain. As he said later: "Before Alamein we never had a victory, after Alamein we never had a defeat."


October 23, 1944 The Naval Battle of Leyte Gulf

The first Japanese force to be located by American forces was Kurita's Centre Force, encountered in the Palawan Passage early on 23 October by two US submarines, Darter and Dace.

Kurita had unaccountably failed to deploy destroyers in an anti-submarine screen ahead of his heavy ships. Darter torpedoed and sank the heavy cruiser Atago, Admiral Kurita's flagship, and Dace torpedoed two heavy cruisers, sinking one - the Takao - and severely damaging the Maya, which was forced to withdraw.

The next day Third Fleet aircraft located the Centre Force. Despite its enormous strength Halsey's fleet was much less well placed to deal with the threat than it should have been. On 22 October Halsey had detached two of his groups to the fleet base at Ulithi to provision and rearm. When the Darter's contact report came in Halsey recalled Davison's group but allowed McCain, with much the strongest of Task Force 38's carrier groups, to continue towards Ulithi. Halsey finally recalled McCain's group on 24 October - but the delay meant that the most powerful group played little part in the coming battle, and Third Fleet was therefore effectively deprived of nearly 40% of its air strength. On the morning of 24 October only three groups were available to hit the Japanese Centre Force, and the one best positioned to do so - Bogan's - was, unfortunately for the US forces, the weakest, containing only one large carrier - Intrepid - and two light carriers.

Moreover, while they were preparing their first strikes against Kurita's force the northernmost of the three carrier groups - Sherman's - came under heavy air attack from aircraft based on Luzon. Three separate raids, each of50-60 aircraft, were repelled - with very heavy losses - by Sherman's fighters and AA fire, but one Japanese dive-bomber got through and hit the light carrier Princeton with a bomb which started fires. Later there was a hugeexplosion in her torpedo stowage which meant that she had to be abandoned. The explosion also damaged the cruiser Birmingham, which was alongside the carrier giving assistance. Terrible casualties were inflicted aboard the cruiser.

Despite all these difficulties Third Fleet - in what is known as the Battle of the Sibuyan Sea - attacked the Centre Force repeatedly during the day, making a total of 259 sorties against Kurita's ships. This force should, according to the Japanese plan, have had considerable land-based fighter cover during its approach to the Philippines, but in fact Kurita was never provided with more than than a token combat air patrol, and, even though his fleet had a large number of anti-aircraft guns (each battleship had 120 or more) their fire proved to be largely ineffective, probably because the gun crews had had very little combat experience. (It was noted that Kurita's AA crews seemed to be more effective towards the end of the Battle off Samar the following day - despite the fact that they must by this stage have been in a state of near-exhaustion).

Eighteen US aircraft were lost in these attacks. The carrier air groups concentrated on the enormous battleship Musashi. A succession of torpedo hits slowed her down and she fell behind Kurita's formation, but the attacks continued relentlessly and at 1935 she capsized and sank, having been hit by at least 10 bombs and the remarkable total of 19 torpedoes.

However, the relatively small number of aircraft attacking (compared with the total air strength of the Third Fleet), their concentration on sinking Musashi at the expense of crippling a large number of Japanese ships, and the inherent difficulty of hitting fast warships free to manoeuvre in the open seas meant that these attacks did not stop Kurita's fleet. The heavy cruiser Myoko was damaged by a torpedo and had to retire, and several other Centre Force ships received bomb hits which caused damage but did not substantially affect their fighting efficiency.

Although Kurita turned his ships away at 1500 he at 1714 resumed his course towards San Bernadino Strait - with a still very powerful force consisting of 4 battleships, 6 heavy cruisers, 2 light cruisers and a dozen destroyers - a force still fully operational and ready to fight.

An hour later he received a signal from Admiral Toyoda, Commander-in-Chief of the Combined Fleet -

"All forces will dash to the attack, trusting in divine assistance."

The Japanese Southern force consisted of two independent groups, Nishimura's group including its two elderly battleships, and a smaller group under Admiral Shima. Both of these were sighted by American aircraft on the morning of the 24th., and Admiral Kinkaid, correctly surmising that these groups would attempt to attack the Leyte anchorage through Surigao Strait, was preparing to repel them. The Seventh Fleet had more than enough strength, in its battleships, cruisers and destroyers, to deal with the Southern Force.

The Japanese decoy force (the Northern Force) had remained undiscovered by the Americans until late on the 24th, but one of its search aircraft had located Sherman's Task Group Three at 0820. At 1145 Ozawa's carriers launched a strike consisting of 76 aircraft which failed to inflict any damage on Sherman's group. The Japanese pilots were so poorly trained that they could not return to their carriers but had to make for airfields
on Luzon after conducting their attack.

Halsey suspected that Japanese carriers were nearby, partly because the aircraft which had attacked Group Three in the morning were of carrier type (although these aircraft were in fact land-based). Air searches were conducted to the north and north-east but did not find Ozawa's battleships until 1540, and did not find the enemy carriers until an hour later.

Having located the Japanese carriers - which he regarded as both the main threat and the main prize - Halsey decided to concentrate his three available carrier groups, with all their accompanying vessels - including the six fast battleships - steam northwards with all this huge force, and annihilate Ozawa's ships during daylight on 25 October.

Halsey took no steps to protect Seventh Fleet from the Centre Force. Third Fleet left San Bernadino Strait entirely unguarded.

As C. Vann Woodward writes "Everything was pulled out from San Bernadino Strait. Not so much as a picket destroyer was left."

Moreover Halsey did not even inform Kinkaid that the Strait was NOT now being covered by the Third Fleet - instead the Seventh Fleet commander had to rely on an intercepted signal, timed 2022, from Halsey to his task group commanders, which indicated that the Third Fleet commander was going north with the three carrier groups to strike the enemy Northern Force.

Seventh Fleet had intercepted an earlier radio signal from Halsey which outlined a plan to form Task Force 34 - a very powerful surface force built around the Third Fleet's fast battleships, which was to be commanded by Vice Admiral Willis Lee.

When Halsey's 2022 message was received, Kinkaid and his staff, in the light of the intercepted "Task Force 34 will be formed . . ." signal, and not envisaging for a moment that the Third Fleet commander would allow the Japanese Centre Force to emerge from San Bernadino Strait entirely unopposed, assumed that the "three groups" referred to were the carrier groups of Third Fleet, and that Task Force 34 had been left behind to guard San Bernadino Strait.

In fact Task Force 34 had not yet been formed, and all the ships which it was expected to contain were heading northwards with the American carriers. Meanwhile the Seventh Fleet, unconcerned about any threat from its northern quarter, and feeling fully confident that the Centre Force would be dealt with by Halsey and the Third Fleet, continued with its preparations to meet the Japanese Southern Force in Surigao Strait.

The Battle of Surigao Strait 2300 October 24 - 0721 October 25

Rear Admiral Jesse B. Oldendorf, with 6 old slow battleships (five of which had been sunk or damaged at Pearl Harbor), 4 heavy and 4 light cruisers, and 26 destroyers, was charged with the task of stopping the Japanese Southern Force in Surigao Strait.

In addition 39 PT boats (motor torpedo-boats) were deployed beyond the Strait. At 2236 one of these, PT-131, made the first contact with the advancing Japanese ships. Over more than three-and-a-half hours the PT boats made repeated attacks on Nishimura's force, but without making any torpedo hits. Nonetheless they made contact reports which were of great assistance to Oldendorf's forces.

As Nishimura's ships entered Surigao Strait they came under devastating torpedo attack from American destroyers disposed on both sides of their line of advance. Both Japanese battleships were hit. The Yamashiro was able to steam onwards, but the Fuso blew up and sank. Three of the Van Force's four destroyers were also hit. Two of these sank, but the third, the Asagumo, was able to retire.

The American destroyer attacks were so successful that when the Japanese force came within range of the batteships and cruisers disposed across the Strait all it consisted of was the battleshipYamashiro, one heavy cruiser and one destroyer. The overwhelming gunfire of the Allied ships sank the Yamashiro and reduced the cruiser - Mogami - to a blazing wreck, but the destroyer, the Shigure, miraculously survived.

The rear of the Southern Force, the "Second Striking Force" commanded by Vice Admiral Shima, had approached Surigao Strait about 40 miles astern of Nishimura. It too came under attack from the PT boats, and one of these hit the light cruiser Abukuma with a torpedo which crippled her and caused her to fall out of formation. Shima next encountered remnants of Nishimura's force, including what he took to be the burning Fuso and Yamashiro but what were in fact the broken halves of the torpedoed Fuso. Shima, much discouraged, decided to withdraw, after which his flagship Nachi collided with the burning Mogami and was badly damaged. Mogami was later sunk by aircraft from the Seventh Fleet's escort carriers.

Oldendorf's force and the PT boats then harried the retreating Japanese. The last shots of the Surigao Strait battle were fired at 0721 when US cruisers and destroyers sank the destroyer Asagumo, torpedoed and damaged earlier in the battle.

At 0723 Oldendorf recalled his light forces from the pursuit.

Less than ten minutes later he received the astounding report that the Seventh Fleet's escort carriers had been surprised by the Japanese main force off Samar and were under heavy attack, a report which meant that the invasion shipping in Leyte Gulf - and the entire Leyte operation itself - was now in great danger.

The Battle off Samar - the Main Action

Seventh Fleet contained a large task group of eighteen escort carriers, divided into three task units of six carriers each.

The main duties of these ships were the provision of combat air patrol over the Leyte beachhead and the invasion shipping, ground attack on Leyte, and anti-submarine patrol. They and their air groups were not trained or equipped to fight an enemy fleet.

At dawn on the 25 October the Seventh Fleet's three escort carrier units were operating off the east coast of Samar. In accounts of the battle these units are generally referred to by their radio call-signs "Taffy One", "Taffy Two" and (the most northerly of the three - Task Unit 77.4.3) "Taffy Three." This last unit, under the command of Rear Admiral Clifton Sprague, had by shortly after 0600 launched 12 fighters and also an anti-
submarine patrol of 6 aircraft to cover the ships in Leyte Gulf, as well as aircraft for Taffy Three's own protection.

It was therefore a very routine morning so far for Taffy Three. The threat from the Japanese Southern Force had been eliminated by Oldendorf's force during the previous night, and Halsey's Third Fleet with its immense strength lay to the north between the escort carriers and the Japanese Central and Northern forces. Or so Clifton Sprague and the men of Taffy Three believed.

But at 0645 AA fire was seen to the north-west, and a minute later the carrier Fanshaw Bay picked up a surface contact on radar.

At 0647 Ensign Jensen - the pilot of a plane from carrier Kadashan Bay - sighted, and then attacked, Japanese ships which he with remarkable accuracy identified as 4 battleships and 8 cruisers accompanied by destroyers.

Then, just before 7am, lookouts on the escort carriers saw the masts and fighting-tops of Japanese battleships and cruisers appear above the northern horizon. A minute later heavy shells began falling near Taffy Three.

The surprise was complete. Taffy Three was in a desperate situation, facing an exceptionally powerful force which also had a great superiority in speed over the escort carriers, while the only ships which Clifton Sprague had available to protect his flattops were the three destroyers and four destroyer escorts of his screen.

At 0657 Sprague had turned his carriers due east, begun working them up to their maximum speed of seventeen-and-a-half knots, ordered all his ships to lay smoke, and started to launch every available aircraft. At 0701 he issued a contact report and a call for assistance from anyone able to give it.

Japanese lookouts had sighted the escort carriers at 0644 when Kurita's ships were deploying from column into a circular anti-aircraft disposition.

Admiral Kurita then ordered "General Attack," permitting his ships' commanding officers to deploy against the US ships on their own inititative and without referring to the flagship. This was to mean that he lost control of the battle, and his giving such an order when his force was already engaged in redeployment caused immense confusion within the Japanese formation.

Shortly after the battle began Taffy Three's carriers entered a rain squall which protected them for about fifteen minutes and enabled Sprague to bring them around to the south-west - i.e. towards Leyte Gulf and the rest of Seventh Fleet.

At 0716 Sprague ordered his three Fletcher-class destroyers - Hoel, Heermann and Johnston - to counter-attack the Japanese formation. This they did with remarkable heroism and tenacity. They unflinchingly took on the battleships and cruisers, engaging these heavy ships with their 5-inch guns as well as their torpedoes.

At about 0750 the American destroyer escorts with equal heroism joined the counter-attack. At 0754 the vast battleship Yamato, now serving as Kurita's flagship after the sinking of Atago on 23 October, was forced to turn away for ten minutes by torpedoes from the American destroyers and was never able to get back into the action.

A very confused struggle by the DDs and DEs against the Japanese force continued for over two hours. By 0945 the Hoel and Johnston, and the destroyer escort Samuel B. Roberts, had been sunk by Japanese gunfire. At least one torpedo hit was made on Kurita's ships, and probably more, but what was of much greater importance was that the Japanese heavy ships had been forced into repeated evasive action and that this had slowed their advance, caused increasing confusion in the already badly disorganised Japanese formation, and deprived Kurita of any chance of regaining effective control of his force.

While the small ships of Clifton Sprague's screen were conducting these desperate counter-attacks the Japanese ships were also subjected to incessant assaults by aircraft from the three Taffies. Many of these attacks were carried out by aircraft armed with weapons intended for ground support and quite unsuited for attack on large warships, and many others were dummy attacks by unarmed aircraft.

Nonetheless, with the weapons available to them, the aircraft succeeded in sinking three heavy cruisers and damaging several other ships. These air attacks also played a vital role in support of the destroyers and DEs in distracting the enemy ships from the escort carriers, forcing them into evasive manoevres, and disorganizing the Japanese formation.

Despite all these heroic efforts the escort carrier Gambier Bay was eventually hit repeatedly by 8-inch gunfire, was crippled, and sank at 0907.

But then, entirely unexpectedly, and although his cruisers and destroyers were now on the verge of annihilating Taffy Three, Kurita at 0911 ordered his ships to break off action.

As Clifton Sprague later recalled -

"At 0925 my mind was occupied with dodging torpedoes when I heard one of the signalmen yell 'Goddamit, boys, they're getting away!' I could not believe my eyes, but it looked as if the whole Japanese fleet was indeed retiring. However, it took a whole series of reports from circling planes to convince me. And still I could not get the fact to soak into my battle-numbed brain. At best, I had expected to be swimming by this time."

While Taffy Three was fighting Kurita's ships, Taffy One was being subjected to the first organized kamikaze attack of the war. Later that morning Taffy Three itself was attacked by kamikazes. At about 1100 the escort carrier St. Lo was crashed by a Zero which caused a series of explosions, and she sank at 1125. Four more of the Seventh Fleet's escort carriers were damaged by kamikaze attack during 25 October.

Meanwhile, far to the north, Third Fleet was attacking the Japanese decoy force in the Battle off Cape Engano.

The Battle of Cape Engano

Shortly before midnight 24 October Halsey's three available carrier groups made rendezvous off Luzon and began a high-speed run northwards to strike the Japanese Northern Force at daybreak. Halsey now passed tactical command of Task Force 38 to Vice Admiral Mitscher.

During the run northward the ships which were to make up Task Force 34 were detached from the carrier groups and Task Force 34 was officially formed at 0240 October 25, with Vice Admiral Lee as Officer in Tactical Command. This force swept northwards in the van of the carrier groups. Halsey's intention was that they would follow up with gunfire the carriers' attacks on Ozawa's ships.

At 0430 Mitscher ordered his carriers to begin arming their first deckloads and to be ready to launch aircraft at first light. He in fact launched his first attack groups, 180 aircraft in all, before the Northern Force had been located, and had them orbitting ahead of his carrier force while he was waiting for the first contact reports to come in from his search aircraft.

The first contact came at 0710. At 0800 Third Fleet's attacks on Ozawa began, meeting little opposition. Task Force 38's air strikes continued until the evening, by which time Mitscher's aircraft had flown 527 sorties against the Northern Force, had sunk Ozawa's flagship Zuikaku (last survivor of the six carriers which had launched the attack on Pearl Harbor) and two of the three light carriers, crippled the remaining light carrier, and sunk a destroyer, aswell as damaging other ships.

Meanwhile, at 0822 when Mitscher's second strike was approaching the Northern Force Halsey in New Jersey received an urgent signal in plain language from Kinkaid saying that the Seventh Fleet escort carriers were under attack off Samar and that assistance from Third Fleet's heavy ships was desperately needed. This was the first of a succession of pleas for help received by Halsey, which he ignored and continued to ignore for nearly three hours, despite their including an alarming report that the Seventh Fleet battleships were low on ammunition. Halsey continued to have Task Force 34 race to the north, while the men of Taffy Three were fighting for their lives and the Leyte invasion itself was being placed in jeopardy.

At 1000 the Third Fleet Commander received a message from Admiral Nimitz, Commander-in-Chief of the Pacific Fleet and Halsey's immediate superior. The message, as handed to Admiral Halsey, read -

"WHERE IS REPEAT WHERE IS TASK FORCE THIRTY-FOUR . . . THE WORLD WONDERS"

This message, indicating that Nimitz was alarmed about the safety of the Seventh Fleet and considered that the Third Fleet battleships should be in action off Samar, eventually persuaded Halsey to turn Task Force 34 around and send it south again. Rear Admiral Bogan's carrier group was also pulled out of the attack on Ozawa's force and sent south to provide air cover and support for Lee's force.

When Lee's battleships were pulled out at 1115 they were almost within gunfire range of the Japanese Northern Force.

Ironically it was by this time too late - if Halsey had turned Lee's force around when he first received Kinkaid's call for assistance the battleships and the cruisers (although not the destroyers which were low on fuel, but might in the circumstances have been left behind) could have arrived off San Bernadino Strait in time to cut off Kurita's withdrawal. As it was, Kurita's force, still containing four battleships and five heavy cruisers, had escaped through the Strait before the Third Fleet's heavy ships arrived there. All Task Force 34 could then accomplish was to sink the straggling Japanese destroyer Nowaki.

In any event, even if Task Force 34 had been turned southwards immediately after 0822, it would have arrived too late to have given any assistance to the ships of Taffy Three, other than in picking up survivors.

When the bulk of Task Force 34 was pulled out of the attack on Ozawa four of its cruisers and nine destroyers were detached under the command of Rear Admiral DuBose to proceed northward with the carriers. At 1415 Mitscher ordered DuBose to pursue Ozawa's ships. His cruisers sank the carrier Chiyoda at around 1700 and the American surface force at 2059 sank the destroyer Hatsuzuki after a stubborn fight.

At about 2310 the US submarine Jallao torpedoed and sank the light cruiser Tama of Ozawa's force. This was the end of the Battle off Cape Engano, and - apart from some final air strikes on the retreating Japanese forces on 26 October - the end of the Battle for Leyte Gulf.

The US had lost one light carrier and two escort carriers, two destroyers and a destroyer escort.

Between 23 and 26 October the Imperial Navy had lost one large carrier (the Zuikaku), three light carriers, three battleships including the giant Musashi, six heavy cruisers, four light cruisers, and twelve destroyers.

Major-General J.F.C. Fuller, in his book "The Decisive Battles of the Western World," writes of this outcome -

"The Japanese fleet had [effectively] ceased to exist, and, except by land-based aircraft, their opponents had won undisputed command of the sea. When Admiral Ozawa was questioned on the battle after the war he replied 'After this battle the surface forces became strictly auxiliary, so that we relied on land forces, special [Kamikaze] attack, and air power . . there was no further use assigned to surface vessels, with the exception of some special ships.' And Admiral Yonai, the Navy Minister, said that he realised that the defeat at Leyte 'was tantamount to the loss of the Philippines.'

As for the larger significance of the battle, he said 'I felt that it was the end.' "


Tuesday, October 21, 2008

Today in History - October 21st

October 21, 1805, Naval Battle of Trafalgar

The Battle of Trafalgar (21 October 1805) was a historic sea battle fought between the British Royal Navy and the combined fleets of the French Navy and Spanish Navy, during the War of the Third Coalition (August-December 1805) of the Napoleonic Wars (1803-1815). The battle was the most decisive British victory of the war and was a pivotal naval battle of the 19th century. Twenty-seven British ships of the line led by Admiral Lord Nelson aboard HMS Victory defeated thirty-three French and Spanish ships of the line under French Admiral Pierre Villeneuve off the south-west coast of Spain, just west of Cape Trafalgar. The Franco-Spanish fleet lost twenty-two ships, without a single British vessel being lost.

The British victory spectacularly confirmed the naval supremacy that Britain had established during the 18th century and was achieved in part due to Nelson's departure from the prevailing naval tactical orthodoxy, which involved engaging an enemy fleet in a single line of battle parallel to the enemy to facilitate signalling in battle and disengagement, and to maximize fields of fire and target areas. Nelson instead divided his smaller force into two columns directed perpendicularly against the larger enemy fleet, with decisive results.

Nelson was mortally wounded during the battle, becoming and remaining Britain's greatest naval war hero. The commander of the joint French and Spanish forces, Admiral Pierre de Villeneuve, was captured along with his ship Bucentaure. Spanish Admiral Federico Gravina escaped with the remnant of the fleet, and succumbed months later to wounds he sustained during the battle.

Nelson is shot on the quarterdeck of Victory

Nelson is shot on the quarterdeck of Victory

October 21, 1876, Souix defeated at Cedar Creek

Battle of Cedar Creek (also called Big Dry Creek or Big Dry River) occurred on October 21, 1876, in the Montana Territory between the United States Army and a force of Lakota Sioux Native Americans during the Black Hills War.

Col. Nelson A. Miles led the 5th infantry in the summer of 1876 from Fort Leavenworth, Kansas, up the Missouri river via a paddlewheeler from Yankton (South Dakota) to the Yellowstone river to help subdue the Sioux and Cheyenne, who had claimed a major victory in the summer at the Battle of Little Bighorn. Miles joined General Terry on the Rosebud in autumn and marched with him up the Rosebud river to join with General Crook. The two commanders together moved east and crossed Tongue river and reached the mouth of the Powder River. Here the two commands separated, with General Crook moving south and east toward the Black Hills and a detachment under Captain Anson Mills engaged and defeated a force of Indians in September at the Battle of Slim Buttes. Mills had been sent by Crook to obtain supplies from the Black Hills because their supplies were running perilously low, and at times, the men had to resort to eating horseflesh to survive.

After separating from General Crook, General Terry with Col. Miles moved north up Dry Creek, east and then south again to evenually reached Glendive, Montana Territory, on the Yellowstone river where the troops established winter headquarters. Col. Miles equipped his troops with winter gear and established a temporary base at the mouth of the Tongue River.

Troops under Col. Elwell S. Otis escorted a train of more than 100 supply wagons that had been dispatched from a post on Glendive Creek, Montana Territory, to supply Miles's troops. On October 11, Sioux warriors ambushed the slow moving wagon train near Spring Creek, killing several mules and temporarily driving off the wagons. Undaunted, the wagon train tried again to reach Miles, but the Indians again attacked it along Spring Creek on October 15. This time, the wagon crews and their escort managed to fend off their attackers and continue their passage.

Soon afterwards, two Indian emissaries approached Colonel Otis and suggested that Miles meet with Sitting Bull, the long revered spiritual leader of the Hunkpapa Sioux. Miles accepted the offer, and set out for Cedar Creek, Montana Territory, north of the Yellowstone River. On October 20, Miles met with the Indian leader to parley between the lines of the Indians and the soldiers, at Sitting Bull's request. Sitting Bull offered to trade for ammunition so his followers could hunt buffalo. He would not bother the soldiers, if they did not bother him. Miles informed Sitting Bull of the government's demands for a surrender. While neither leader was pleased, both agreed to meet on the morrow after consulting with their subordinates.

Some of Sitting Bull's minor chiefs wanted to leave the warpath and return to the reservations, but many others wanted to fight. On October 21, the conference resumed. Sitting Bull again demanded that Miles and his soldiers leave, and that no more wagon trains be allowed in Sioux territory. He threatened to kill any chief who still wanted to lead his band back to the reservations. The talks quickly broke down, and the leaders returned to their forces. Soon, gunfire erupted. After a sharp skirmish, Sitting Bull withdrew. The army claimed to have chased the Lakotas for up to 42 miles, collecting large quantities of dried meat, lodge poles, camp equipage, ponies and broken down cavalry horses, and arms along the way. On October 27, over 400 lodges (with 2,000 men, women, and children) formally surrendered to Miles and peacefully returned to their reservations. However, some of Sitting Bull's more ardent followers headed northward for Canada, and Miles made preparations to pursue them throughout the winter.

First Sergeant Henry Hogan of Company G of the 5th U.S. Infantry received the Medal of Honor for his actions at Cedar Creek, one of two such medals he would be awarded.

October 21, 1899, Battle of Elanslaagte, during the Boer War

When the Boers invaded Natal, a force under General Kock (comprised mainly of men of the Johannesburg Commando, with detachments of German volunteers)[2] occupied the railway station at Elandslaagte on October 19, 1899, thus cutting the communications between the main British force at Ladysmith and a detachment at Dundee. Learning that the telegraph had been cut, General Sir George White sent his cavalry commander, Major General John French to recapture the station.

Arriving shortly after dawn on October 21, French found the Boers present in strength, with two field guns. He telegraphed to Ladysmith for reinforcements, which shortly afterwards arrived by train.

While three batteries of British field guns bombarded the Boer position, and the 1st Battalion, the Devonshire Regiment advanced frontally in open order, the main attack commanded by Colonel Ian Hamilton (1st Battalion, the Manchester Regiment, 2nd Battalion, the Gordon Highlanders and the dismounted Imperial Light Horse) moved around the Boers' left flank. The sky had steadily been growing dark with thunderclouds, and as the British made their assault, the storm burst. In the poor visibility and pouring rain, the British infantry had to face a barbed wire farm fence, in which several men were entangled and shot. Nevertheless, they cut the wire or broke it down, and occupied the main part of the Boer position.

Some small parties of Boers were already showing white flags when General Kock led a counterattack, dressed in his top hat and Sunday best.[3] He drove back the British infantry in confusion, but they rallied, inspired by Hamilton (and reportedly, a bugler of the Manchesters and a Pipe-major of the Gordons) and charged again. Kock and his companions were killed.

As the remaining Boers mounted their ponies and tried to retreat, two squadrons of British cavalry (from the 5th Lancers and the 5th Dragoon Guards) got among them with lances and sabres, cutting down many. This was almost the only time during the Boer war that a British cavalry charge made contact.

General Kok and his personal staff

General Kok and his personal staff